*This post contains affiliate links. If you make a purchase following an affiliate link, I’ll receive a small commission.
This post includes:
◉ FREE Pattern: The entire written pattern for FREE.
The ad-free PDF contains an easy-to-follow crochet chart!Available at mandobug.com and on Ravelry.
◉ Video Tutorial: Helpful video tutorial goes over special stitches used in this pattern.
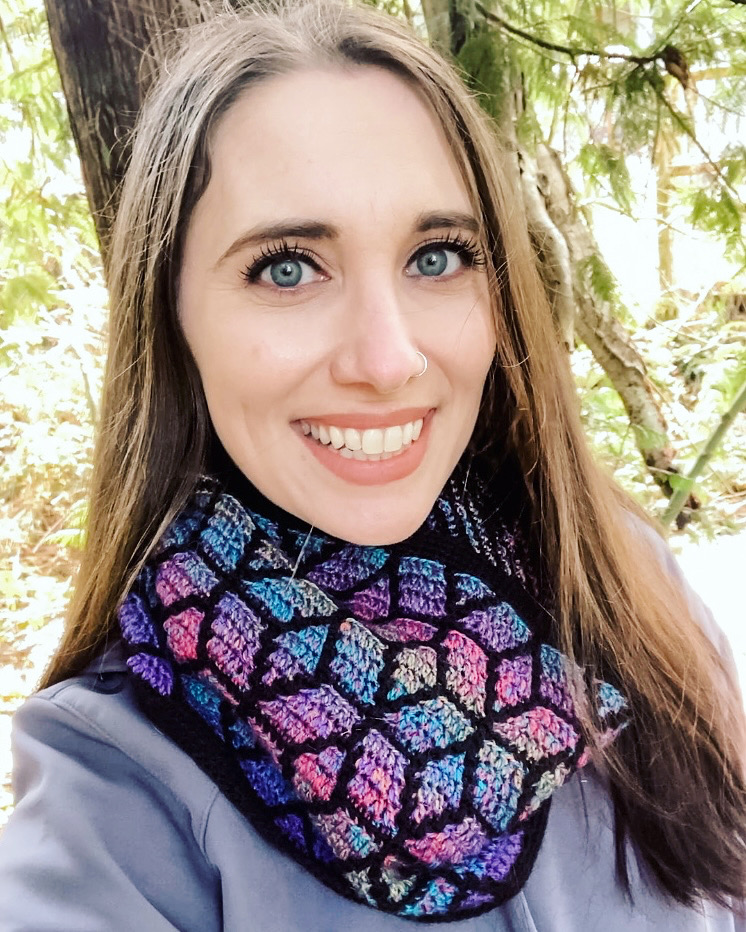
The Skyshard Mosaic Cowl is an intermediate pattern that uses the overlay mosaic crochet technique. Each row is worked using a single color. Strategically placed single crochets and double crochets create this stunning stained glass crystal design.
Find a printer-friendly, PDF version of the Skyshard Mosaic Cowl at mandobug.com and on Ravelry.
The Cowl’sConstruction
Worked from the bottom up the Skyshard Mosaic Cowl starts with a few rows of single crochet in the back loop only using the contrast color. The body of the cowl is worked using an overlay mosaic crochet technique. Each row is worked using a single color. You will either be placing a single crochet in the back loop only or placing a double crochet in the front loop of the row below. When working in the front loop of the row below, skip the corresponding stitches in the current row unless stated otherwise.
Choosing the Right Yarn
This project includes instructions for using two different colors of either a category 1 super fine fingering weight yarnOR a category 4 medium worsted weight yarn.
For my fingering weight sample, I used Hobbii Dream Colour,a gradient color-changing blend of superwash merino and nylon, and Hobbii Evergreen, an organic wool solid colored yarn. But if wool is not for you, that’s no problem! This pattern works well in acrylic and cotton yarns as well!
For my worsted weight sample, I usedHobbii Lollipop Melange, a marled striping wool acrylic blend, and Hobbii Amigo XL a soft acrylic solid colored yarn.
What color should I choose? For this pattern, I highly recommend using contrasting colors. I really like the look of an ombre, gradient, variegated, speckled, or self-striping yarn for the main color and a solid color for the contrast color. You’ll want to choose a contrast color that does not match any of the shades of the main colored yarn to avoid distorting the patterns image. Two solid colored contrasting colors would also be a great choice.
Is there a yarn you would avoid? The only yarns I would avoid for this pattern are yarns that have a fuzzy halo or have an inconsistent thickness. These types of yarn have a lot of natural texture that may distort the appearance of the colorwork design.
Skyshard Mosaic Cowl Details
Skill Level
Intermediate (uses basic stitches with complex shaping)
437 yds (400 m) / 3.5 oz (100 g) (shown in color 11 as main color)
1 ball Hobbii Evergreen, 100% Organic Wool, 251 yds (230 m) / 1.75 oz (50 g) (shown in color 08 as contrast color)
Worsted Weight Version
1 cake Hobbii Lollipop Melange, 30% Superwash Wool, 70% Acrylic, 382 yds (350 m) / 7 oz (200 g) (shown in color 08 as main color)
2 skeins Hobbii Amigo XL, 100% Acrylic, 109 yds (100 m) / 1.75 oz (50 g) (shown in color 11 as main color)
*Contains affiliate links. If you make a purchase following a link, I’ll receive a small commission.
Hook
Fingering weight version
US size D hook (3.25 mm) or size needed to obtain gauge.
Worsted weight version
US size H hook (5 mm) or size needed to obtain gauge.
Notions
Tapestry needle for weaving in ends.
Finished Measurements
Fingering weight version
Circumference – 26” (66 cm)
Length – 9.25” (23.5 cm)
Worsted weight version
Circumference – 26.25” (66.5 cm)
Length – 11” (28 cm)
Gauge
Fingering weight version
18 stitches = 3.25” (8.3 cm)
16 rows = 2.75” (7 cm)
in stitch pattern.
Worsted weight version
18 stitches = 5.25” (13.5 cm)
16 rows = 4.5” (11.5 cm)
in stitch pattern.
Abbreviations
blo – back loop only
CC – contrast color
CD* – centered double crochet decrease
ch – chain
DD* – diagonal down
dc– double crochet
DU* – diagonal up
flo – front loop only
MC – main color
sk – skip
st(s) – stitch(es)
* see Special Stitches
Special Stitches
Need help with the special stitches?
Diagonal Up (DU)
Worked over two stitches.
Sc in blo of indicated st, dc in flo in row directly below sc just made, sk next st.
Diagonal Down (DD)
Worked over two stitches.
Sk first indicated st, dc in flo in next st 1 row below, sc in blo in row directly above dc just made.
Centered Double Crochet Decrease (CD)
Worked over three stitches.
Sc in first indicated st, yarn over, insert hook into front loop in row directly below sc just made, yarn over and pull up a loop, yarn over and pull through 2 loops, sk next st, yarn over, insert hook into front loop of next st 1 row below, yarn over and pull up a loop, yarn over and pull through 2 loops, yarn over and pull through all 3 loops on hook, sc in blo of st in row directly above front loop just worked in.
Find a printer-friendly, charted PDF version of the Skyshard Mosaic Cowl at mandobug.com and on Ravelry.
Skyshard Mosaic CowlFree Crochet Pattern
Worked from the bottom up the Skyshard Mosaic Cowl starts with a few rows of single crochet in the back loop only using the contrast color. The body of the cowl is worked using an overlay mosaic crochet technique. Each row is worked using a single color. You will either be placing a single crochet in the back loop only or placing a double crochet in the front loop of the row below. When working in the front loop of the row below, skip the corresponding stitches in the current row unless stated otherwise.
Notes
Pattern is written using US crochet terminology.
Pattern is written and charted. Charted instructions start on page 8.
Pattern is written for fingering weight with worsted weight version in parentheses. Ex: Ch 144 (90)
Pattern repeats are placed within brackets and braces.
When working in the front loop of the row below, skip the corresponding stitches of the current row unless stated otherwise.
When changing colors, join the new color by completing the final pull-through of the previous stitch using the new color.
Pattern is worked continuously in the round, do not sl st to join.
Bottom Border
If you wish to adjust the circumference of the cowl, add or subtract 18 stitches from the beginning chain. This will adjust your circumference by 3.25” (8.3 cm) for the fingering weight version and by 5.25” (13.5 cm) for the worsted weight version. Please note that it will also affect yarn requirements.
Using CC, chain 144 (90).
Round 1: Being careful not to twist the chain, join to work in the round by placing a sc in the first chain. Sc in each ch around.
(144 sc (90 sc))
Rounds 2-4: sc in blo around.
Drop CC. Carry CC up on the wrong side here and throughout the body of the cowl.
Body
When starting the body work Setup Round 1. This creates a clean border. This is the only time you will work that round and when you do, skip Repeating Round 1 and continue with Round 2.
Join MC,
Setup Round 1: sc in blo around.
Using MC,
Repeating Round 1: [sc in blo in next 2 sts, dc in flo 1 row below in next 5 sts, sc in blo in next 11 sts] repeat around.
Drop MC. Carry MC up on the wrong side here and throughout the body of the cowl.
Using CC,
Round 2: [sc in blo in next st, DU over next 2 sts, sc in blo in next 3 sts, DD over next 2 sts, sc in blo of next 5 sts, dc in flo 1 row below in next st, sc in blo in next 4 sts] repeat around.
Using MC,
Round 3: [dc in flo 1 row below in next 2 sts, sc in blo in next st, dc in flo 1 row below in next 3 sts, sc in blo in next st, dc in flo 1 row below in next 4 sts, DD over next 2 sts, sc in blo of next st, DU over next 2 sts, dc in flo 1 row below in next 2 sts] repeat around.
Using CC,
Round 4: [sc in blo in next 2 sts, DU over next 2 sts, sc in blo of next st, DD over next 2 sts, sc in blo in next 5 sts, dc in flo 1 row below in next st, sc in blo in next st, dc in flo 1 row below in next st, sc in blo in next 3 sts] repeat around.
Using MC,
Round 5: [dc in flo 1 row below in next 3 sts, sc in blo in next st, dc in flo 1 row below in next st, sc in blo in next st, dc in flo 1 row below in next 4 sts, DD over next 2 sts, sc in blo in next st, dc in flo 1 row below in next st, sc in blo in next st, DU over next 2 sts, dc in flo 1 row below in next st] repeat around.
Using CC,
Round 6: [sc in blo in next 3 sts, CD over next 3 sts, sc in blo in next 5 sts, dc in flo 1 row below in next st, sc in blo in next 3 sts, dc in flo 1 row below in next st, sc in blo in next 2 sts] repeat around.
Using MC,
Round 7: [dc in flo 1 row below in next 4 sts, sc in blo in next st, dc in flo 1 row below in next 4 sts, DD over next 2 sts, sc in blo in next st, dc in flo 1 row below in next 3 sts, sc in blo in next st, DU over next 2 sts] repeat around.
Using CC,
Round 8: [sc in blo in next 4 sts, dc in flo 1 row below in next st, sc in blo in next 5 sts, dc in flo 1 row below in next st, sc in blo in next 5 sts, dc in flo 1 row below in next st, sc in blo in next st] repeat around.
Using MC,
Round 9: [sc in blo in next 11 sts, dc in flo 1 row below in next 5 sts, sc in blo in next 2 sts] repeat around.
Using CC,
Round 10: [sc in blo in next 4 sts, dc in flo 1 row below in next st, sc in blo in next 5 sts, DU over next 2 sts, sc in blo in next 3 sts, DD over next 2 sts, sc in blo in next st] repeat around.
Using MC,
Round 11: [dc in flo 1 row below in next 2 sts, DD over next 2 sts, sc in blo in next st, DU over next 2 sts, dc in flo 1 row below in next 4 sts, sc in blo in next st, dc in flo 1 row below in next 3 sts, sc in blo in next st, dc in flo 1 row below in next 2 sts] repeat around.
Using CC,
Round 12: [sc in blo in next 3 sts, dc in flo 1 row below in next st, sc in blo in next st, dc in flo 1 row below in next st, sc in blo in next 5 sts, DU over next 2 sts, sc in blo in next st, DD over next 2 sts, sc in blo in next 2 sts] repeat around.
Using MC,
Round 13: [dc in flo 1 row below in next st, DD over next 2 sts, sc in blo in next st, dc in flo 1 row below in next st, sc in blo in next st, DU over next 2 sts, dc in flo 1 row below in next 4 sts, sc in blo in next st, dc in flo 1 row below in next st, sc in blo in next st, dc in flo 1 row below in next 3 sts] repeat around.
Using CC,
Round 14: [sc in blo in next 2 sts, dc in flo 1 row below in next st, sc in blo in next 3 sts, dc in flo 1 row below in next st, sc in blo in next 5 sts, CD over next 3 sts, sc in blo in next 3 sts] repeat around.
Using MC,
Round 15: [DD over next 2 sts, sc in blo in next st, dc in flo 1 row below in next 3 sts, sc in blo in next st, DU over next 2 sts, dc in flo 1 row below in next 4 sts, sc in blo in next st, dc in flo 1 row below in next 4 sts] repeat around.
Using CC,
Round 16: [sc in blo in next st, {dc in flo 1 row below in next st, sc in blo in next 5 sts} twice, dc in flo 1 row below in next st, sc in blo in next 4 sts] repeat around.
A crochet along (CAL) is an event where a group of people crochets the same project (or type of project) during a specific time period.
When is the CAL?
The CAL will run from March 7th – 31st, 2022. The pattern will be available as a free download for the duration of the CAL.
How do I participate?
The CAL chat will be hosted in the Mandobug Crafters Corner Facebook Group. That is where you can ask questions, share your progress by posting pictures, and see other participants’ projects. The group is private so you will need to request to join and answer a few questions; this is not to be exclusive but to filter bots and spam accounts out of the group. You can also share your pictures or videos on any social media by using #skyshardcal . Using this hashtag on your posts allows people to see your progress when they follow or search for the hashtag. You can also search for and follow this hashtag to see the progress of others.
What color should I choose?
I highly recommend using contrasting colors for this pattern. I really like the look of an ombre, gradient, variegated, speckled, or self striping yarn for the main color and a solid color for the contrast color being careful to choose a contrast color that does not match any of the shades of the main colored yarn. Two solid colored contrasting colors would also be a great choice.
Is there a yarn you would avoid?
The only yarns I would avoid for this pattern are yarns that have a fuzzy halo or have an inconsistent thickness. These types of yarn have a lot of natural texture that may distort the appearance of the colorwork design.
Are you in!?
Let me and others know you’ve joined by sharing a picture of your gathered materials or your gauge swatch in the Mandobug Crafters Corner Facebook Group or by using #skyshardcal on any other social media platform. I’ve seen a few people share their yarn choices already!
Pattern Details
Description
The Skyshard Mosaic Cowl is an intermediate pattern that uses the overlay mosaic crochet technique. Each row is worked using a single color. Strategically placed single crochets and double crochets create this stunning stained glass crystal design. The cowl is worked seamlessly from the bottom up. Instructions are both written and charted and include detailed information on how to customize the cowl’s circumference and length. Both a fingering weight and a worsted weight version are included in this pattern.
Skill Level
Intermediate (uses basic stitches with complex shaping)
Finished Measurements
Fingering weight version
Circumference – 26” (66 cm)
Length – 9.25” (23.5 cm)
Worsted weight version
Circumference – 26.25” (66.5 cm)
Length – 11” (28 cm)
What are the Required Materials?
Yarn Requirements
Fingering Weight Version
Main Color (MC) – 225 yds / 206 m
Contrast Color (CC) – 225 yds / 206 m
Worsted Weight Version
Main Color (MC) – 180 yds / 165 m
Contrast Color (CC) – 180 yds / 165 m
Suggested Yarns*
*Contains affiliate links. If you make a purchase following a link, I’ll receive a small commission.
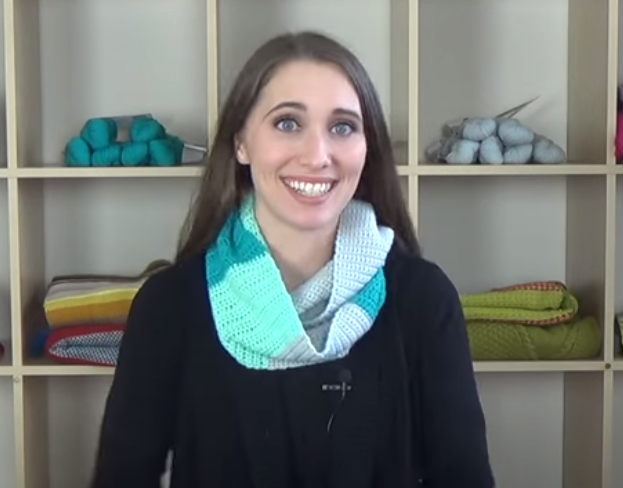
◉ FREE Pattern: The entire written pattern for FREE.
◉ Video Tutorial: A helpful video going over the required materialsand how to work each row in the cowl.
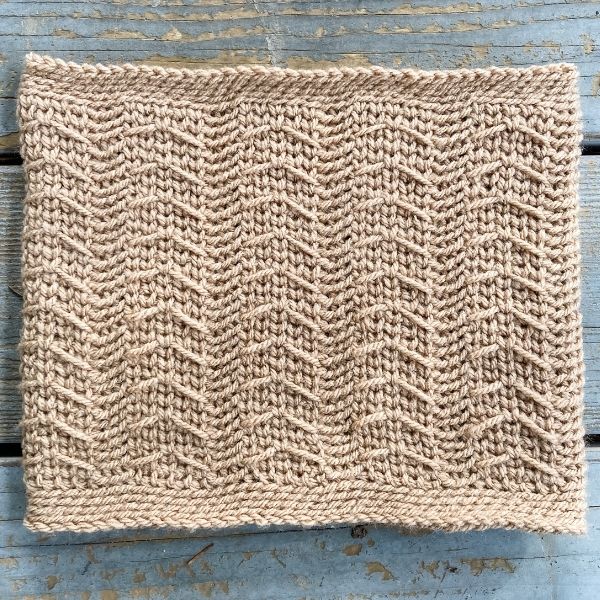
The Gulls and Slips crochet cowl is an intermediate crochet pattern designed to imitate the look of the gulls and garter knit stitch. You can crochet this stunning textured cowl by weaving a floater strand of yarn through your stitches as you crochet to leave floats behind. Later, you’ll come back and crochet those strands into place creating the beautifully textured arrows of the design.
Find a printer-friendly, PDF version of the Gulls and Slips Cowl at mandobug.com and on Ravelry.
The CowlConstruction
This crochet cowl is worked in the round from the bottom up and is easy to customize in size. I’ll be sharing the multiples you need to repeat the stitch pattern so you can customize the circumference of the cowl, as well as the multiple for the row repeats so you can easily customize the length of your cowl.
Choosing the Right Yarn
This project uses a category 4 medium worsted weight 100% acrylic yarn. I used Lion BrandBasic Stitch Premiumwhich is now discontinued, but you can get Lion Brand Basic Stitch Anti Pilling which is a very close match. This fluffy worsted weight 100% acrylic yarn has a tight twist perfect for creating the crisp stitch definition to really make this stitch pattern pop. If this isn’t the right yarn for you, I recommend searching for a category 4 medium worsted weight yarn that has a high twist and a smooth texture. Yarns that have low twist or have a fuzzy halo will distract from the stitch pattern making it hard to see. This is also true for highly variegated yarns. I recommend avoiding those as well, unless you don’t mind the colors distracting from the overall pattern.
Gulls and Slips Cowl Details
Skill Level
Intermediate (uses complex stitches, simple shaping, and skilled tension control)
Finished Measurements
A – Circumference
20” (51 cm)
B – Length
9” (23 cm)
Yarn Requirements
Worsted Weight (#4 Medium)
175 yds (165 m)
Suggested Yarn
1 skein Lion Brand Basic Stitch, 100% Acrylic,
185 yds (170 m) / 3.5 oz (100 g)
Hooks
US size K-10.5 (6.5 mm) hook or size needed to obtain gauge.
Notions
Tapestry Needle
Removable Stitch Marker (optional for marking the beginning of the round)
Gauge
16 stitches, 17 rows = 4” in Gulls and Slips stitch pattern (Body Rounds 2-4 repeated)
Insert hook from front to back through the center of the two vertical posts (legs) of the single crochet being worked into, yarn over and pull up a loop, yarn over and draw through both loops on hook.
Floater Yarn Forward (fyf)
Move floater yarn from the back of work to the front under working yarn.
Floater Yarn Back (fyb)
Move floater yarn from the front of work to the back under working yarn.
Waist Coat 1 Under Loose Strand (wc1 uls)
Insert hook under floater yarn below, then through the center of the two vertical posts (legs) of the single crochet being worked into, yarn over and pull up a loop, yarn over and draw through both loops on hook.
Get the printer-friendly, PDF version of the Gulls and Slips Cowl at mandobug.com and on Ravelry.
Gulls and Slips Video Tutorial
Gulls and Slips Cowl Free Pattern
The Gulls and Slips Cowl is worked from the bottom up with a slip stitch border on the top and bottom. The body is created by using the Gulls and Slips stitch pattern. This pattern uses an unusual technique of weaving a second “floater” yarn in and out of your work on occasional rows.
Pattern Notes
You need to use two different strands of yarn in some rounds. You can hand wind your yarn into two balls or you can wind it into a cake using a ball winder and pull from the inside and outside of the cake.
Work all stitches loosely.
Do not slip stitch to join at the end of the round.
Use a stitch marker to keep track of the beginning of the round.
For video support watch the Gulls and Slips Cowl video tutorial.
Bottom Border
Ch 80 (or any multiple of 8) loosely.
It is very important that you work ALL stitches in the entire pattern loosely. If any stitches are worked too tightly it becomes difficult to insert the hook into the correct spaces.
Round 1: Join to work in the round by working a slip stitch into the back bump of first chain, being careful not to twist the stitches, sl st in back bump of each chain around, do not slip stitch to join here and throughout pattern. Use a stitch marker to keep track of beginning of round.
Rounds 2 – 4: sl st in blo of each stitch around.
Body
Round 1: [sl st 3 in blo, sc 5 in blo] around.
You will now join a second strand of “floater” yarn that will weave through the front and the back of your work creating “floats.” Be careful not to pull floats too tightly.
Round 2: Join a second strand of yarn underneath the working yarn with the tail in front, [sl st 3 in blo, fyf, wc 5, fyb] around.
Leave the floater yarn in the back, you won’t work with this yarn again until you repeat this round again later.
Easy as 1-2-3 is an absolute beginners cowl pattern designed to teach you how to crochet! This three color cowl is perfect for those looking to learn how to crochet because it features three of the most commonly used crochet stitches in an order that allows you to build your skills. Each stitch is worked in a different color creating eye catching blocks of color that also help you learn to read your stitches. If you have been wanting to learn to crochet but are looking for more than just a plain design, this pattern is for you!
This design features:
• Three colors of HiKoo® Simplicity
• 1 skein each of your three favorite colors (Shown in colors 36 Silver Hair (A), 09 Aqua Mint (B), 10 Deep Turquoise (C))
• Written Instructions, Charts, and Video Tutorials (which will be released during the CAT)
• Skills you will learn include how to work a chain, single crochet, half double crochet, and double crochet. How to whip stitch, weave in ends, read a crochet pattern, and read a crochet chart.
Skills you will learn include over the course of 4 weeks:
• How to chain
• How to single crochet
• How to half double crochet
• How to double crochet
• How to read crochet patterns
• How to read crochet charts
• How to work flat
• How to change colors
• How to count rows
• How to weave in ends
• How to whip stitch
This free pattern was originally released in 2017 over the course of four weeks:
March 2nd- Week 1 March 9th – Week 2 March 16th – Week 3 March 23rd – Week 4
Now that the complete pattern is available you can follow it at your own pace or host your own 4 week Crochet Along using a similar timeline.