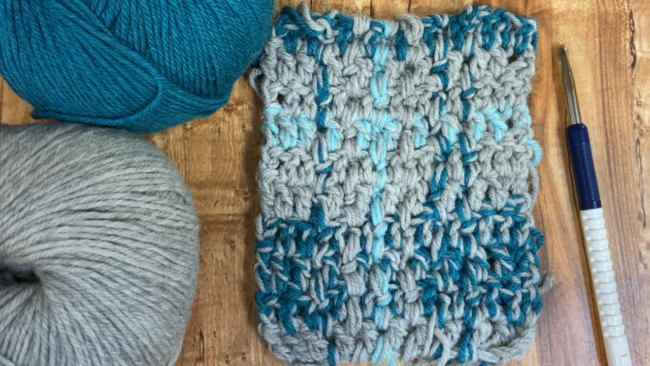
Create plaid the easy way! Woven surface crochet creates a beautiful fabric with a woven appearance perfect for creating plaid without having to do any colorwork changes mid-row or sewing! Instead, you are weaving surface crochet in and out of your fabric. This technique is not just for plaid either. It can be used for other color-striped patterns as well. Learn the stitch combination below and have fun using it creatively.
How to Crochet: Woven Surface CrochetStitch Pattern
Tip: Work woven surface crochet loosely to avoid gathering rows too tightly and warping the finished fabric.
Woven Surface Crochet:
Join yarn using a woven surface crochet join, [top surface crochet, chain 2, bottom surface crochet, chain 1] repeat along the length of the fabric. Fasten off yarn and weave in ends. When working stripes of woven surface crochet next to each other, alternate whether you start with a top surface crochet or a bottom surface crochet.
Woven surface crochet join:
Insert hook in space between indicated stitches at bottom of piece, from back to front, yarn over and pull up a loop, chain 2.
Top surface crochet:
Insert hook in space between next set of stitches from front to back, bring hook to front in space between next stitches, yarn over and pull through all loops on hook.
Bottom surface crochet:
Remove hook from working loop, skip 1 space between stitches, insert hook in next space between stitches from top to bottom, front to back, bring hook to front in skipped space, place working loop back on hook and pull through.
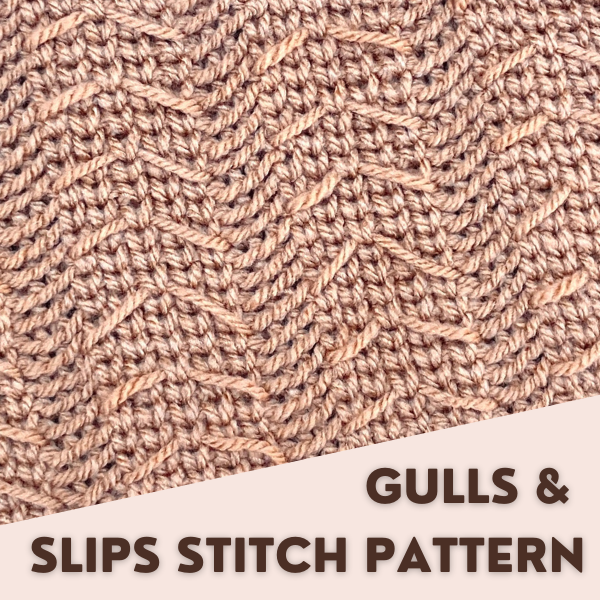
The Gulls and Slips Crochet Stitch Pattern was inspired by the Gulls and Garter Knitting Stitch Pattern. After using the Gulls and Garter knit stitch in a hat and cowl set I wondered if I could recreate a similar look in crochet and I’m happy to report that I was successful! The crochet version does however require an unusual technique of weaving a second “float” strand in and out of your work on occasional rows. It also uses a stitch that helps grab and secure the floats from your previous round.
If you’re ready to give this new stitch pattern a try you can watch the video tutorial below or keep scrolling for the written instructions. And bonus! I will have patterns featuring this stitch coming out soon!
Notes
• Choose a hook one to two sizes larger than the recommended size on the yarn’s label.
• Work all stitchesloosely.
• You need to use two different strands of yarn in one round. If you can’t pull from the inside and the outside of your yarn, you can wind it into a cake using a ball winder, or hand wind your yarn into two balls.
• In order for the waistcoat stitches to imitate the knit stitch, this pattern looks best when worked in the round.
Beginning Chain
Chain any multiple of 8
Round 1
Slip stitch to join to work in the round, this counts as the first slip stitch in the repeat, place a marker to keep track of the beginning of the round. Working loosely
[slip stitch 3, waistcoat 5] around.
Round 2
Take a second strand of yarn which will be referred to as the “float” yarn and place it under your working yarn with the tail in the front of your work. Leaving the float yarn in the back,
[slip stitch 3 in back loop only, move float yarn to front, waist coat 5, move float yarn to back] around.
Round 3
[slip stitch 3 in back loop only, waist coat 5] around.
Round 4
[slip stitch 3 in back loop only, waist coat 2, waist coat stitch grabbing the float yarn below, waist coat 2] around.
Stitch Repeat
To continue in pattern repeat Rounds 2 – 4.
Tag Me!
I hope you enjoy this stitch pattern! If you make give it a try, tag me in your picture on social media using @mandobug#gullsandslips. And I can’t wait to share my upcoming cowl and hat patterns featuring this stitch pattern!